
Before I dive into the theatrical performance of what it’s like installing IKEA SEKTION kitchen cabinets, I wanted to dedicate this post to all of you who have survived putting together a piece of IKEA furniture.
Hell this post is dedicated to those of you brave enough to go to to IKEA on a weekend. If you went to the kitchen section to actually plan your kitchen, how are you even reading this post?
You should be at a bar. If you took your kids, you already know you need a vacation.
Because truly, IKEA on a weekend is like a testing ground for whether or not a couples marriage will end in divorce by the time they leave the store. It’s like weekends at Costco, minus the giant grocery carts. Except you trade those in for flat bed carts.
Then you choreograph a routine to ensure your car is in a furniture delivery parking spot, perfectly timed for when one of you leaves the cash register area with the ‘ready to be assembled’ kitchen of your dreams.
Just when you think the store trip is over, you realize it’s just the beginning. Because what awaits you at home is the fresh hell that I like to call IKEA assembly instructions.
INSTALLING IKEA SEKTION KITCHEN CABINETS
Forget your allen (hex) key for this one. IKEA’s Kitchen Installation Guide comes complete with a cartoon character blob person, that reminds me of a cartoon I used to watch as a child called La Linea.
This friendly guy below.
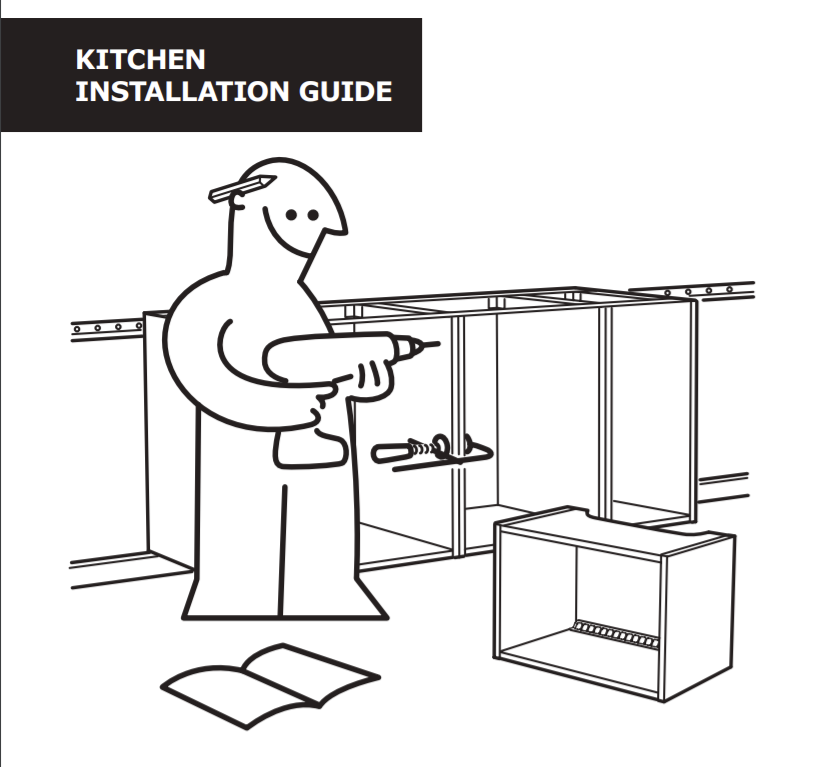
He looks super happy to be installing IKEA kitchen cabinets doesn’t he?
But they also have real life drawings of actual people too. In the drawing below, you’re the happy couple, enjoying a coffee break in the kitchen that has yet to be installed.
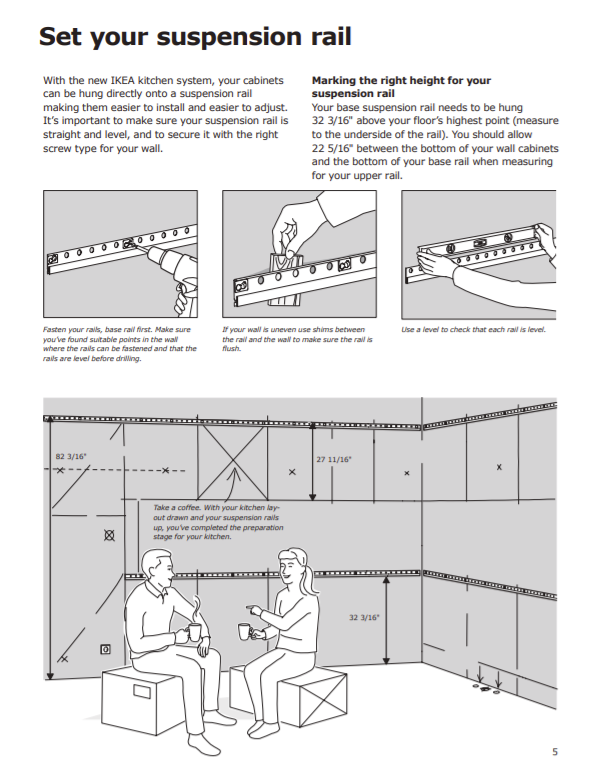
The children that are crying in the background because they came home with the stomach flu the first day you demolished your kitchen, they’re not in there. Neither is the photo of your living room where everything else is placed while your kitchen is being finished.
True story.
PS – For the full IKEA SEKTION Kitchen Installation guide, click here.
IKEA’S SUSPENSION RAIL SYSTEM
Now before you think I am about to tear into their updated railing system, I will say it is actually a very good thing that they’ve done. The suspension rail system makes it a lot easier to perfectly place your cabinets exactly where you want them to be.
And if you make a mistake or change your mind, you won’t have to physically unscrew your cabinets from the wall and move them over.
You can just gently slide the cabinet over on the rail.
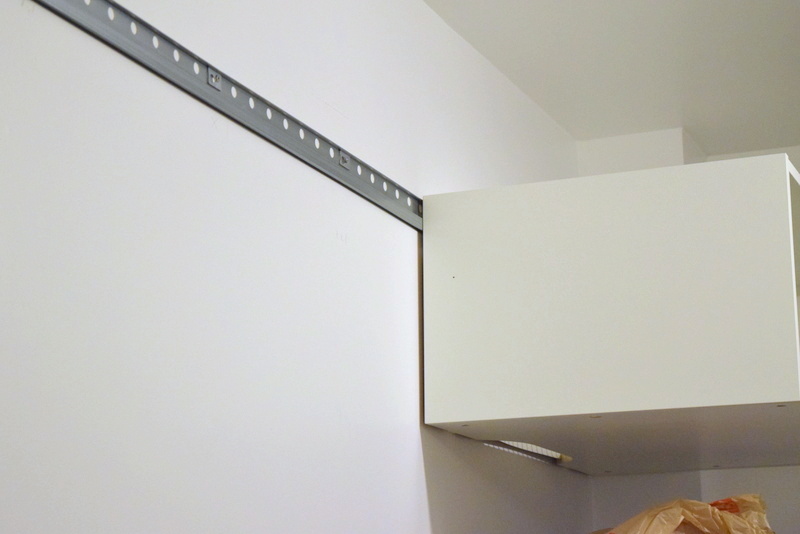
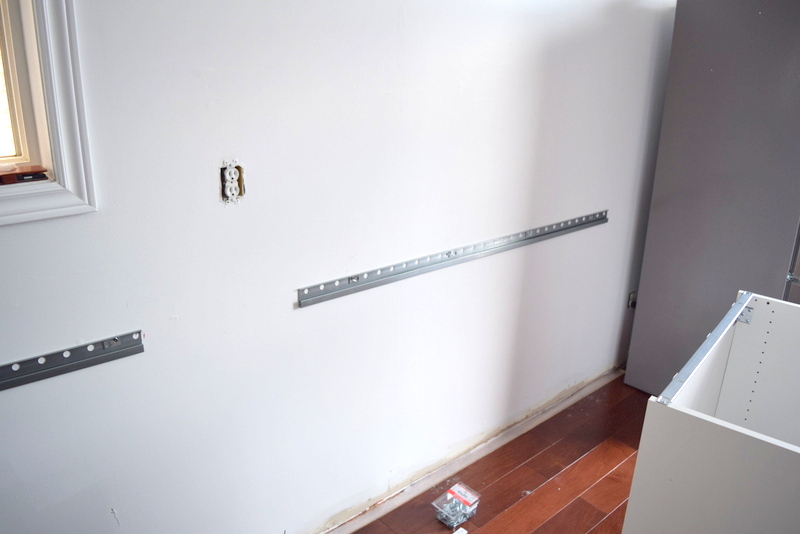
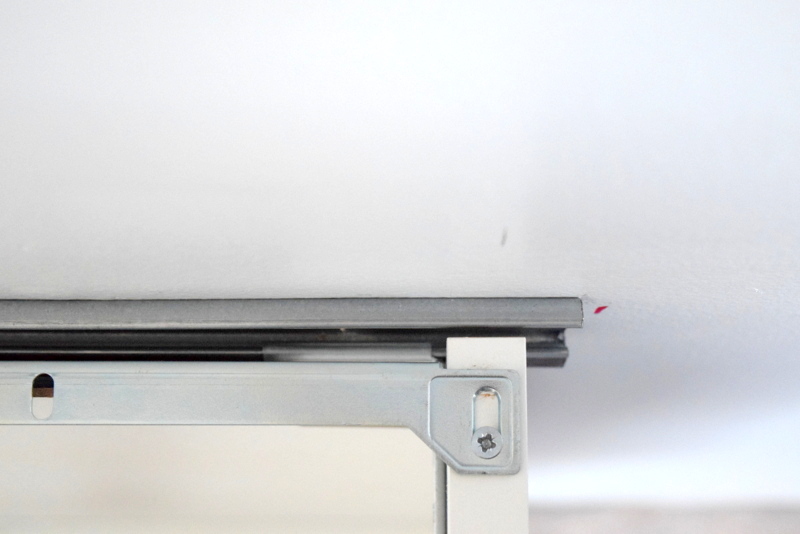
The problem lies with the holes in the railings. It is assumed that the holes and where you want to place your cabinets in your kitchen will magically line up with your wall studs and you’ll be able to drill them securely into the stud through one of the holes.
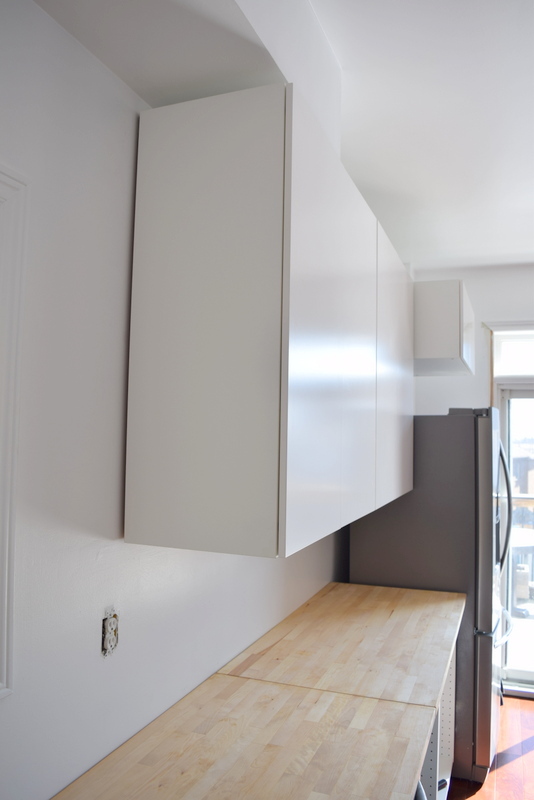
That’s not always the case. Exhibit A below.
We had to drill through the railing itself to line up where the screw had to go into the stud. If you’re wondering why we couldn’t just move it over, it’s because the cabinets needed to be exactly in those spots in the kitchen, based on our measurements and placements of where everything had to go. Including our appliances.
So the railing had to go where it had to go. IKEA’s guide basically says don’t do this, but there is absolutely no other solution offered.
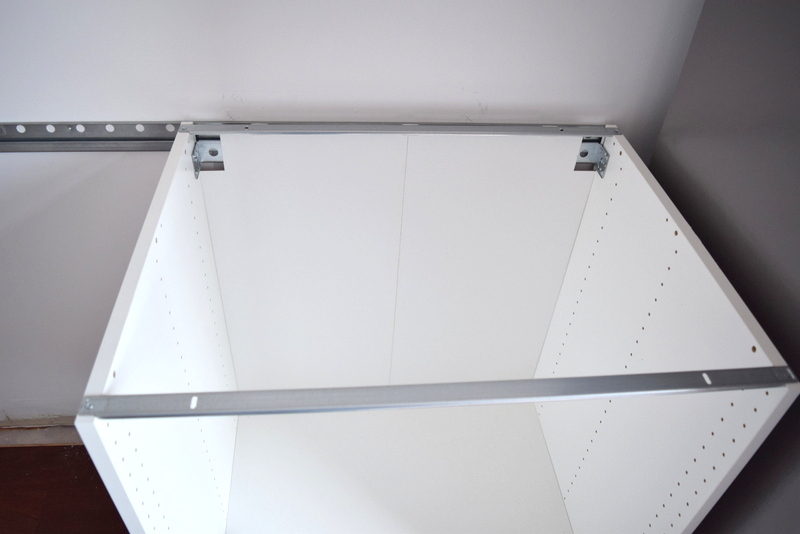
As pictured in the first image above, the cabinets are hung onto the railings, using brackets that you attach to the inside of the cabinet.
The following are photos of the lower SEKTION kitchen cabinets on the suspension rail.
Left side of cabinet on the IKEA Suspension Rail
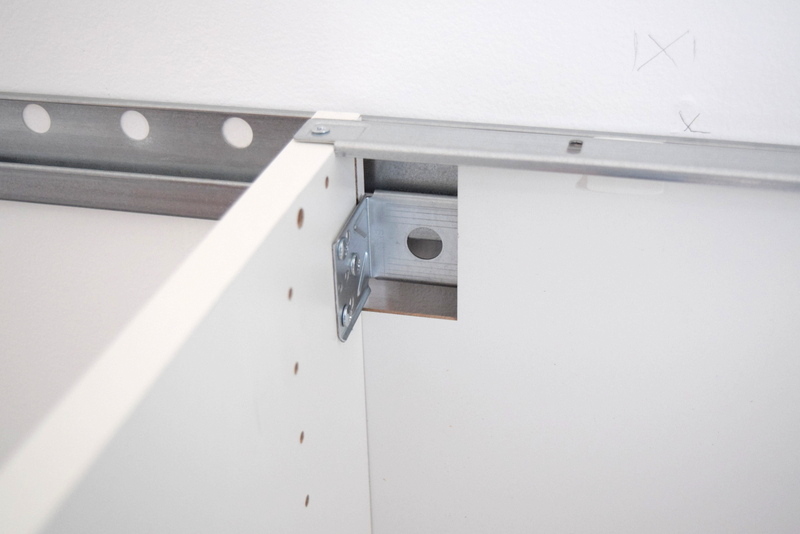
Left Side, Top View
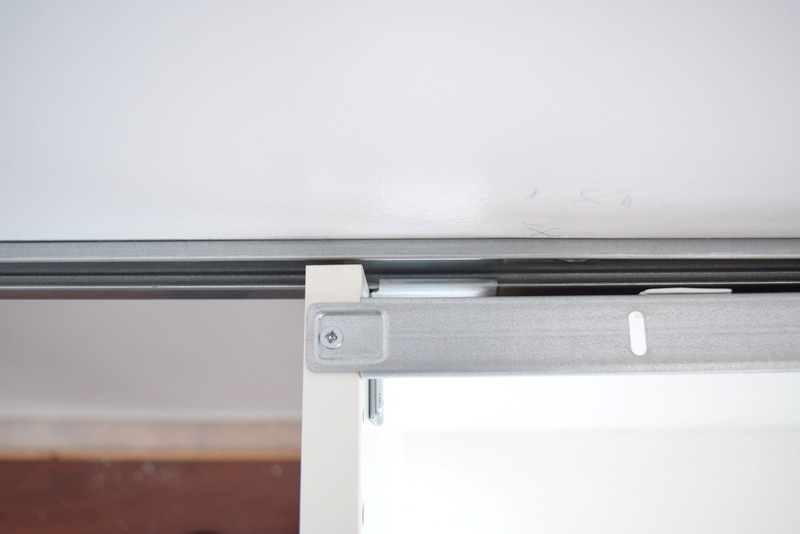
Right side of cabinet on the IKEA Suspension Rail
Right Side, Top View
Cabinet on the Suspension Rail
- TIP: You can attach the brackets to the railing first, and then drill the cabinets to them if you prefer.
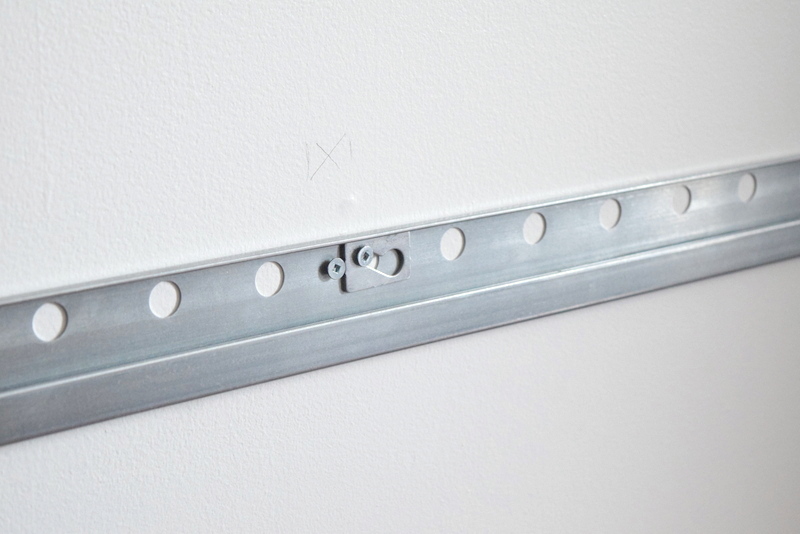
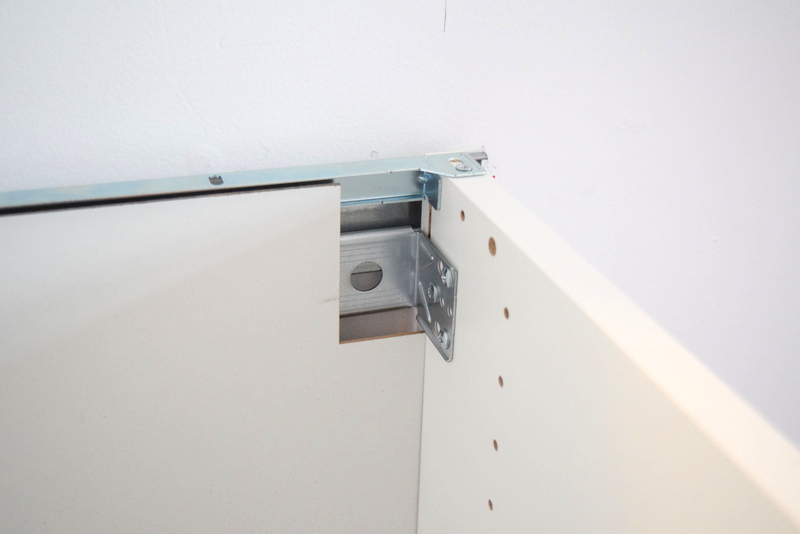
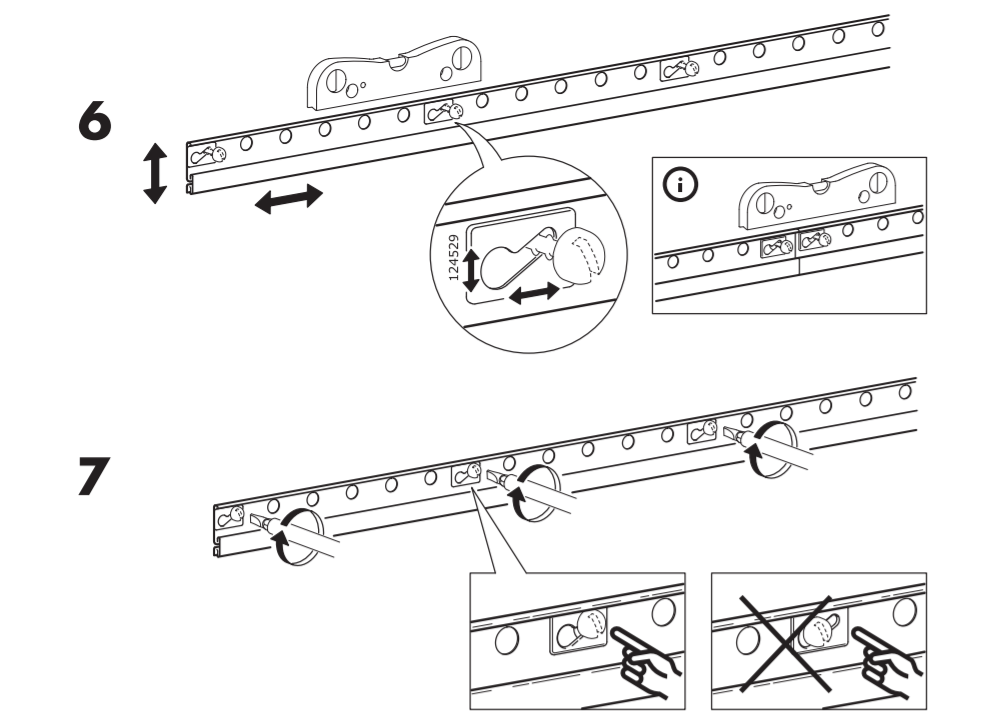
THE METAL BRACKETS AND THE SUSPENSION RAIL
The best part – and I say best part loosely – of the suspension rail system, is the little metal fastener bracket thing that goes into between the railing and your screw. I can’t even remember what they’re for at this point (everything becomes a blur).
- Please note: Again, your screw will most likely be going into one of those empty holes in the rail.
If look at IKEA’s cartoon instructions, they make this look easy as pie.
No.
This is a two person job that involves a level and your patience. Which is pretty much the whole process of installing IKEA SEKTION kitchen cabinets, but especially this part.
What we wound up doing, is screwing holes into the wall first, with screws strong enough to loosely hang the railing off of. Then we gently hung the railing over the screws.
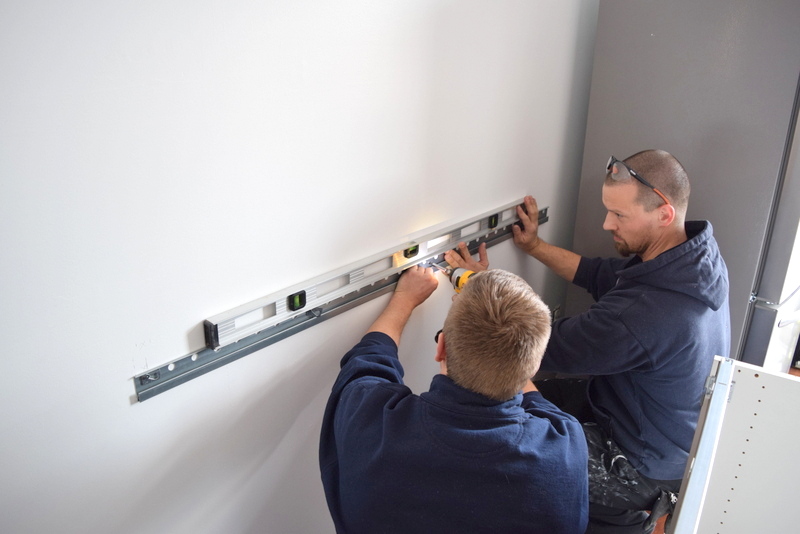
Afterwards we put the metal fastener bracket thing over the screws, and checked to make sure the railings were level. Finally, we screwed them into tight to attached the railing to the wall.
While your situation may not be this difficult in our circumstances it was two person job.
Could you do this by yourself? Maybe. But I wanted to write about this just in you case you’re struggling or are tackling this for the first time. By all means, get an extra set of hands to help out ahead of time.
ONE MORE TIME – For the full IKEA Suspension Rail Assembly Instructions, click here.
The IKEA cartoon man that appears one more time with the “?” bubble above his head and that may or may not resemble your behaviour during this process. Suddenly I miss allen keys.

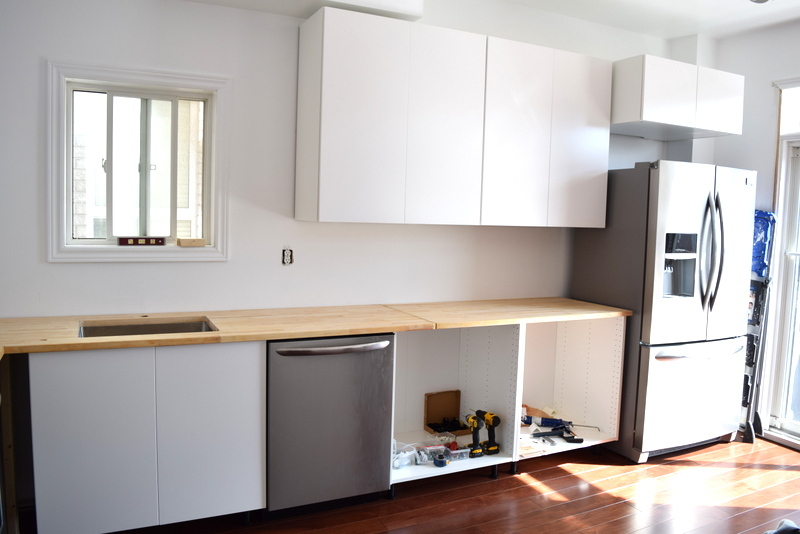
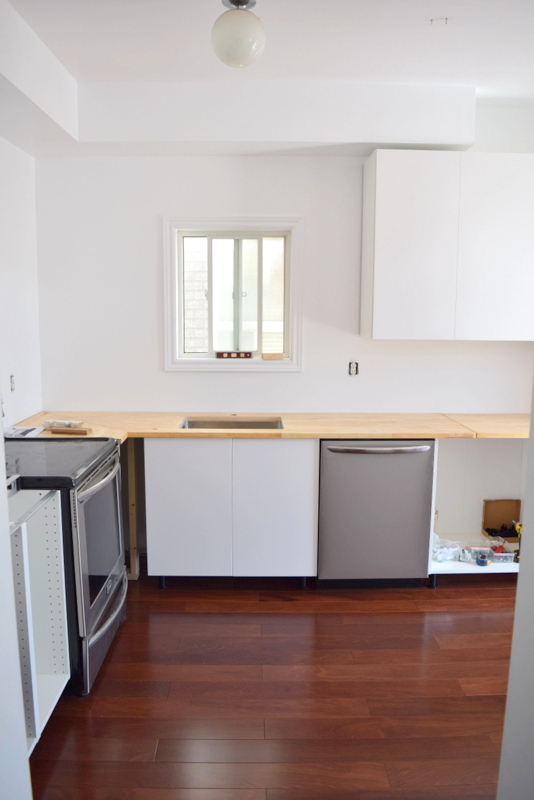
HANGING YOUR IKEA SEKTION KITCHEN CABINETS
Once you get the railing sorted out, the rest is actually pretty simple. It’s put together your cabinets and attach them to your railing. Or so says the person that did not put together the cabinets.
This will take you well into the night and then some.

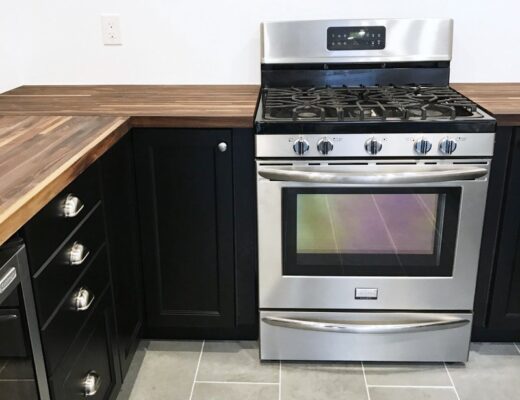
INSTALLING THE BUTCHER BLOCK COUNTER TOPS
In the following days came the butcher block countertop installation.
We had to return one of the original pieces of it that we delivered, because it was warped. I strongly suggest before you leave IKEA, to check inside the box and make sure the wood on your soon to be butcher block counter top is flat. It will save you gas, time and shipping costs.
As it turns out it, it took us having to return it to realize one long panel of IKEA Butcher Block counter tops, can indeed fit into the back of our truck.
PLEASE NOTE:
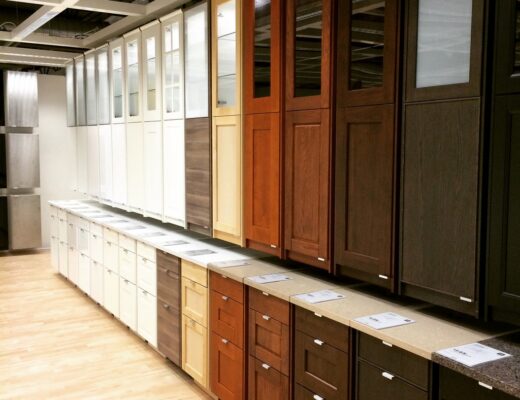
If you reading this any time over 2019, apparently IKEA no longer sells solid wood, butcher block counter tops. Every wood counter top they currently carry, is a mix of wood and veneer. When in doubt, I highly recommend asking Reddit’s IKEA community. They can answer just about any stock question you have.
UNDERMOUNT SINK
My brother in law notched out some holes in what was to be the underside of the counter tops and this is how they were fastened together under. He did a killer job in cutting out and making an undermount sink in the butcher block.
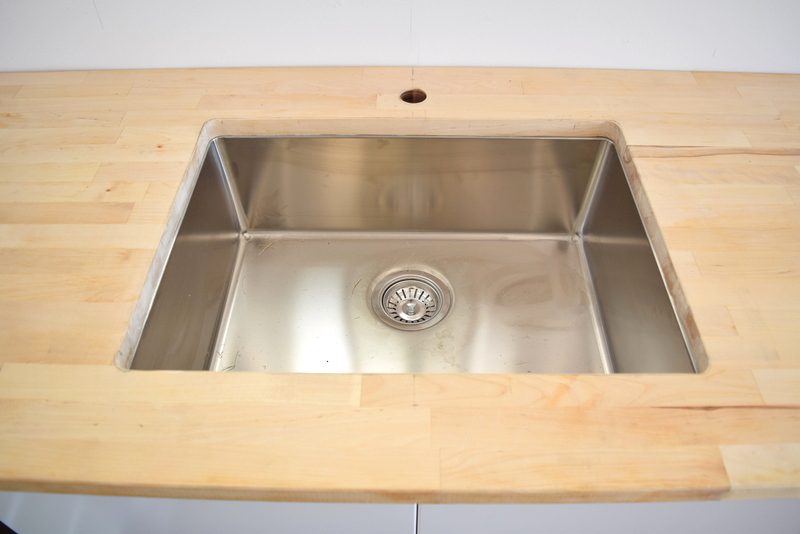
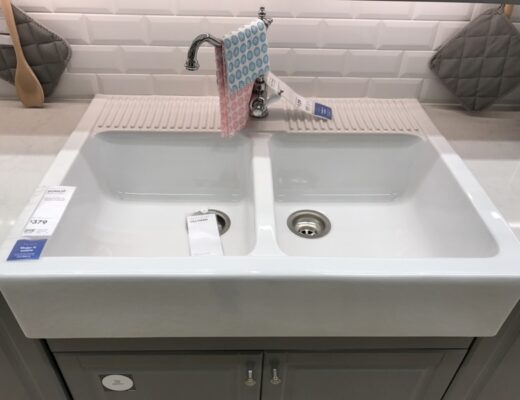
We used the IKEA BREDSKÄR Single Bowl Sink. That has since been discontinued and replaced with a similar model called the NORRSJÖN.
I need to write a post called “In Defense of One Bowl Sinks.” I am never ever, ever, ever, ever going back to a dual bowl sink. This has changed how I use and see sinks.
A HELPFUL TIP FOR INSTALLING AN UNDERMOUNT SINK IN BUTCHER BLOCK
Here is a big hint on how to make a template to cut out your hole for your IKEA sink in butcher block. What my brother in law used the actual cardboard box that the sink came in, because the cardboard is cut out to match the exact measurements and shape of the top of the sink.
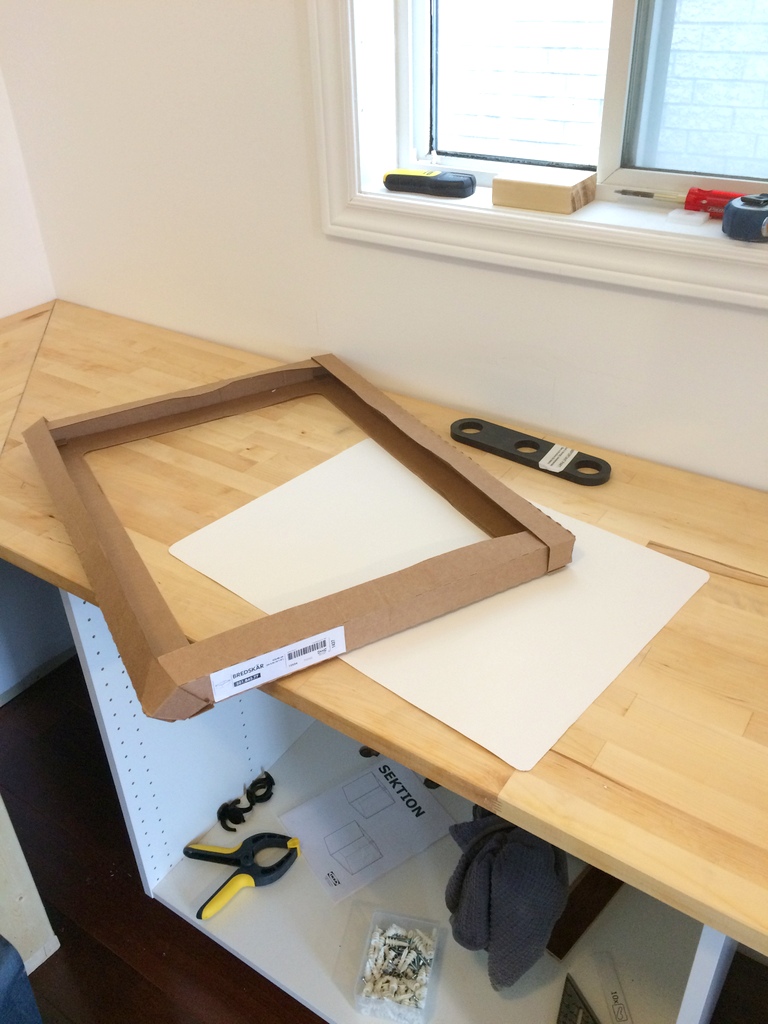
Therefore it makes the perfect stencil. Brilliant!
All you have to do is trace that onto the wood. He did a test template with it in some plywood first to make sure it was indeed the right fit and it worked perfectly.
So save the cardboard box the sink comes in!!!
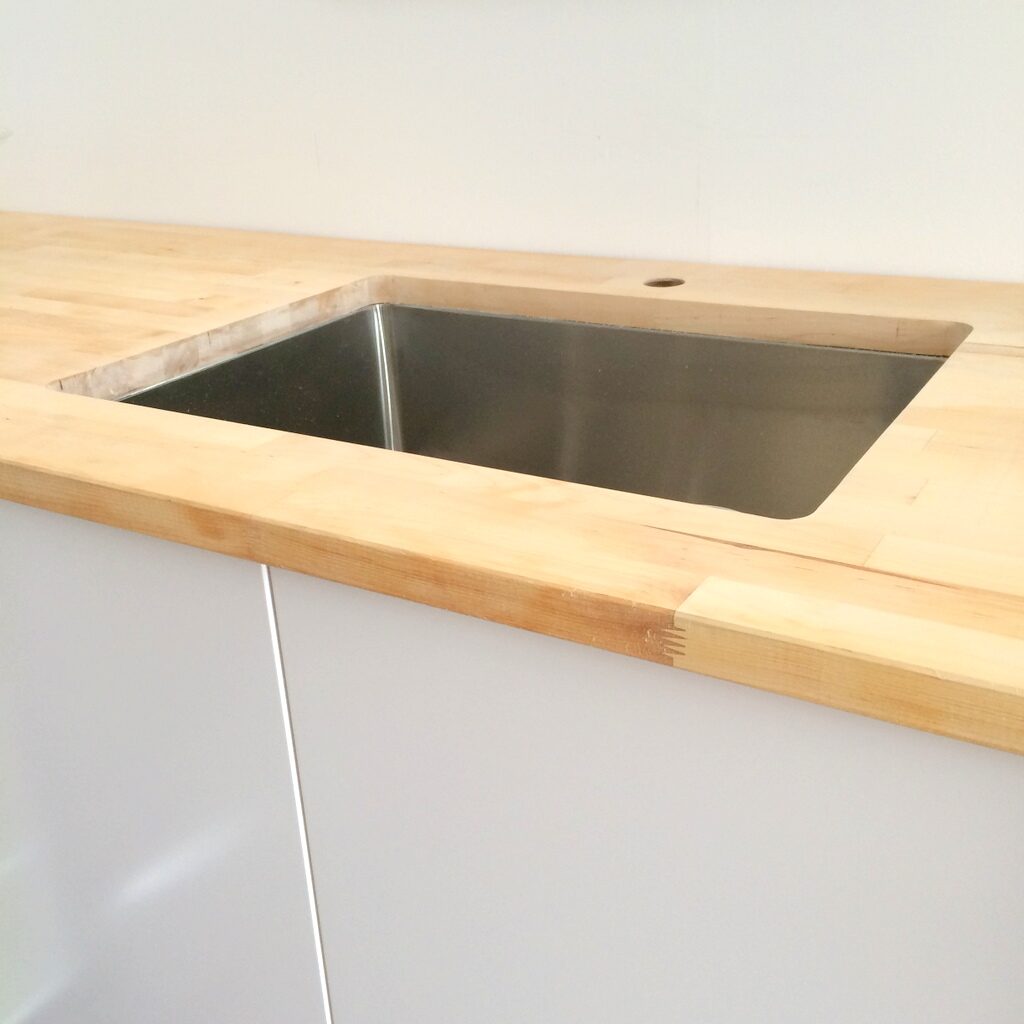
And bit by bit it, came together.
INSTALLING IKEA SEKTION – The light at the end of the tunnel…
Then we had to wait about 3 months for back ordered drawer fronts from IKEA. But I’ll save that for a Lessons in Renovating your Kitchen wrap up post. It’ll be a good one because there were so many we learned in the process of installing our IKEA SEKTION kitchen.
Want to read about the whole process and see the Before and After?
1 – Planning your IKEA Kitchen Remodel
2 – You just read it!
3 – Adventures in Staining Butcher Block
4 – IKEA Kitchen Before and After Reveal
5 Comments
Michael
April 24, 2022 at 2:24 pmHow do you actually install the under mount sink?
Andrew Harrington
February 1, 2025 at 7:10 pmThank you
Sara Skees
February 24, 2025 at 9:14 amHow did you attach the cabinets to each other? I’m at that step and the screw just isn’t going any further and I don’t want it sticking out.
Thanks!
Michael Kuzmin
March 11, 2025 at 10:39 amWhen installing the rail, you should have used a laser. Also, this is definitely a one-person job. Scew in so that it holds in place, then keep adjusting and tightening, while making sure the top or the bottom edge is matching the laser line. Also, I prefer to flip that rectangular washer so that the entire top side is straight, I’m not sure why they want us to install it the other way around.
queen bee
March 17, 2025 at 9:17 pmTHANK YOU for posting up close photos of how the rails attach. I looked at so many YouTube tutorials to be check I was interpreting the instructions correctly and NONE OF THEM showed the rail up close. The first cabinet I had to install was really tricky and I couldn’t have done it without these photos. Thank you!!!!