
Before I get into talking about the IKEA SEKTION kitchen, and sharing the big reveal of the kitchen that we just put into our house, I wanted to take a moment to say a note of thanks to the old kitchen that we spent 5 years living with. During the time I was feasting my eyes on the old wood 80’s arched cabinets and laminate counter top, I had to admit I was not impressed. But as I’ve gotten older, I’ve grown to appreciate kitchens for what they are – the heart of the home. Where you are lucky enough to have a hot meal and running water. The rest is really just icing on the cake.
In this case, the icing was my unhealthy obsession with an IKEA SEKTION kitchen. Specifically, white with butcher block countertops, which I needed to get out of my system. Honestly I really should just work at IKEA and do kitchen displays per season. I can deal with that.
Without further ado…
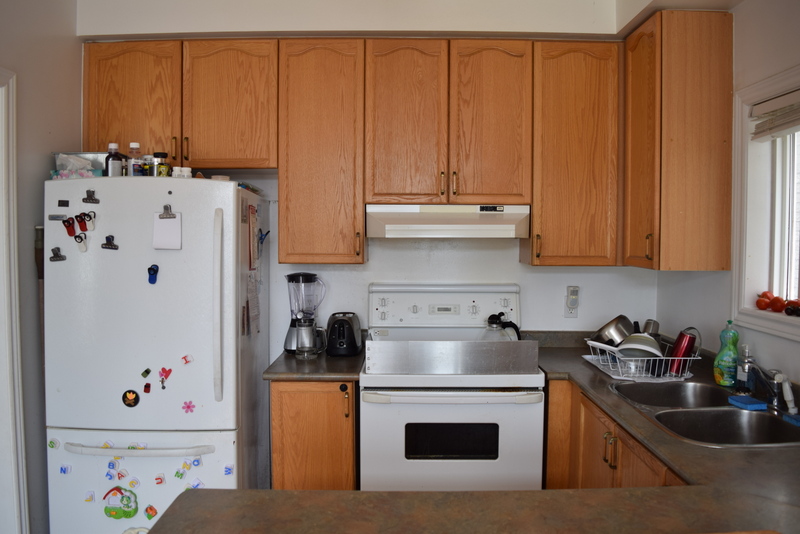
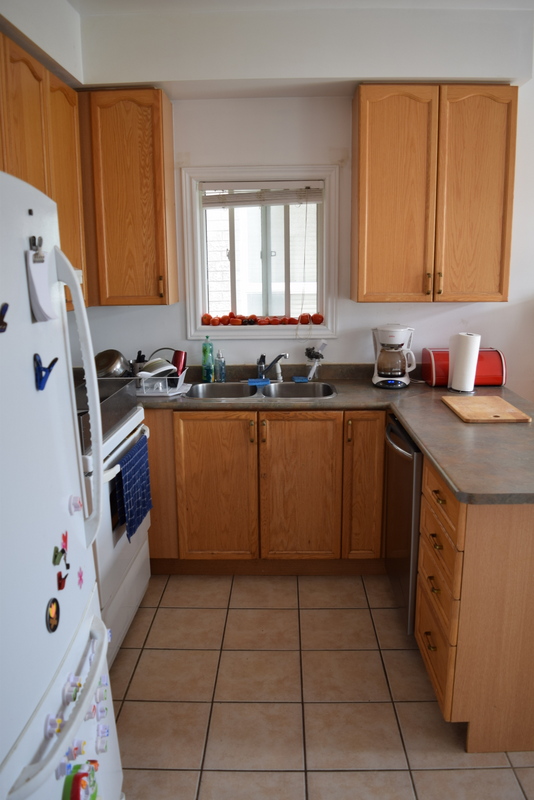
THE KITCHEN BEFORE PHOTOS
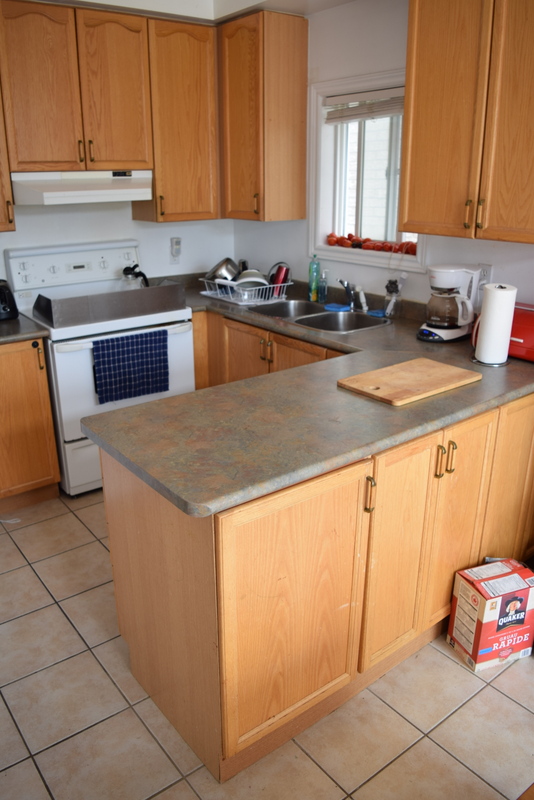

Anyone want some Quaker Oats?
But seriously that IKEA JOKKMOKK table set served us very well for so many years.
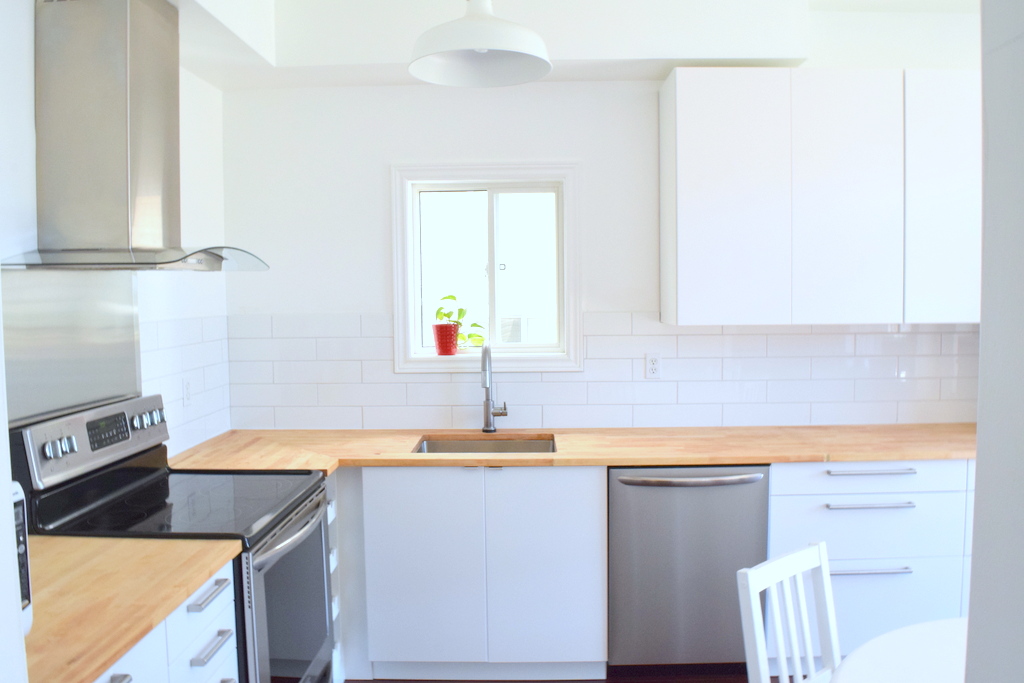
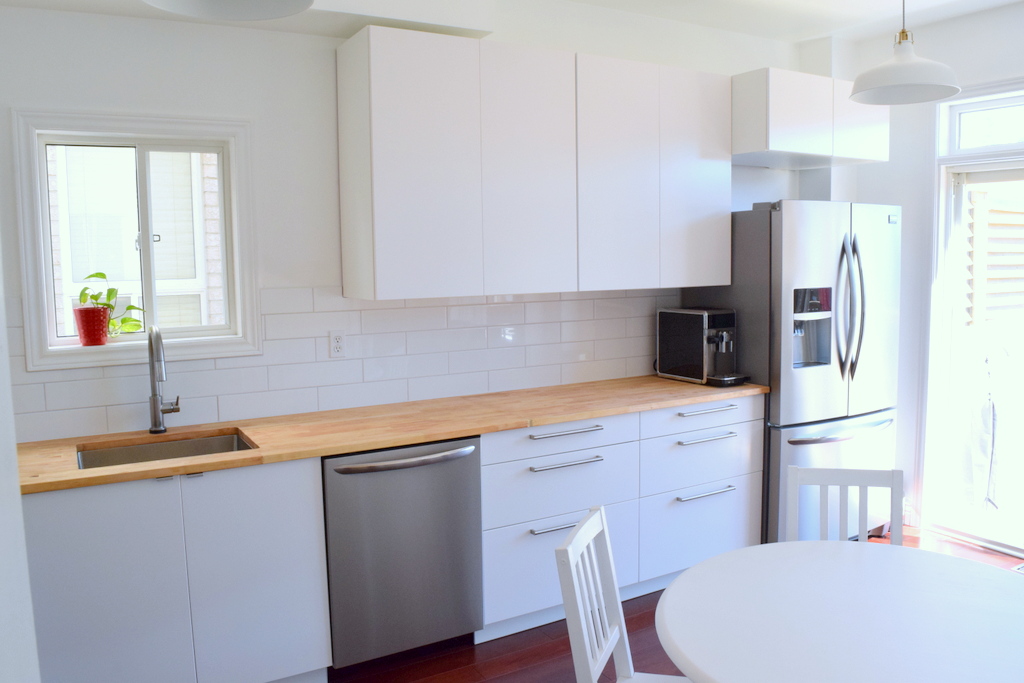
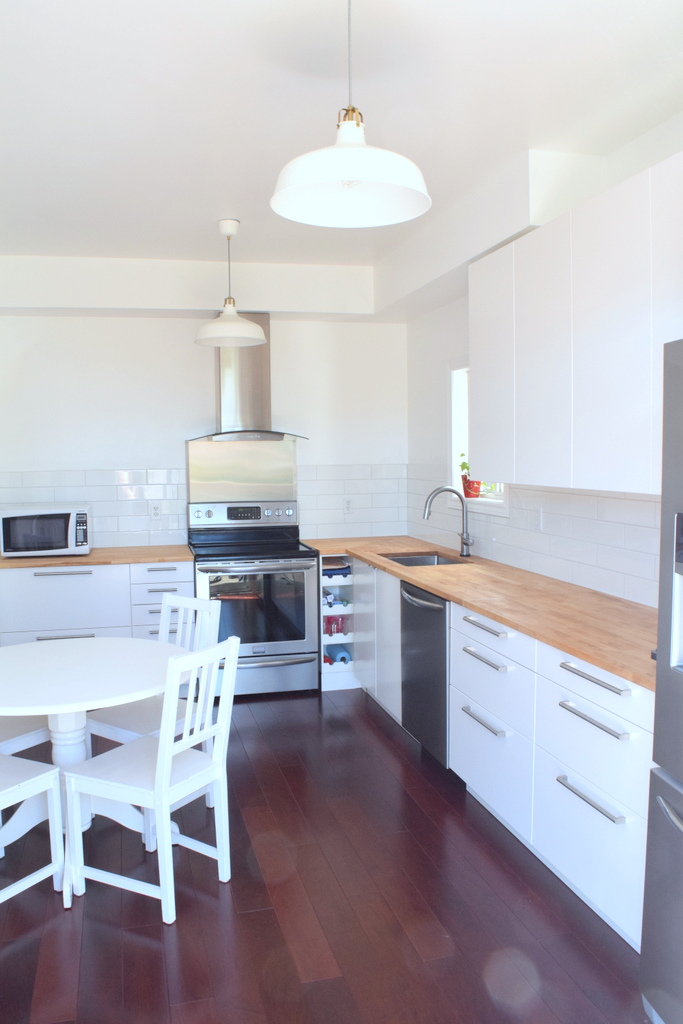
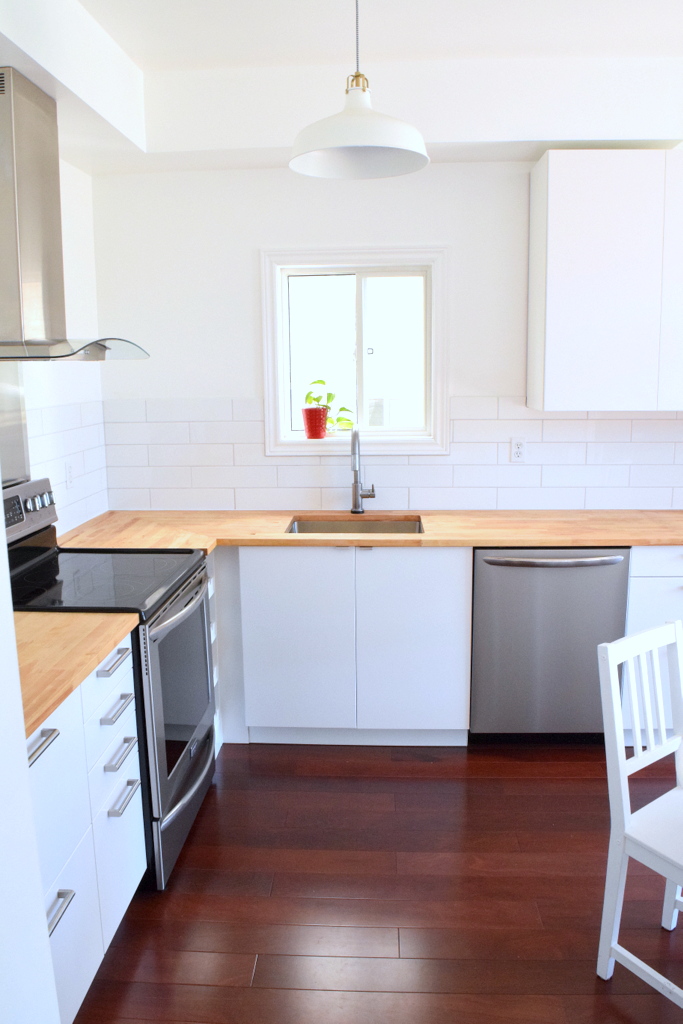
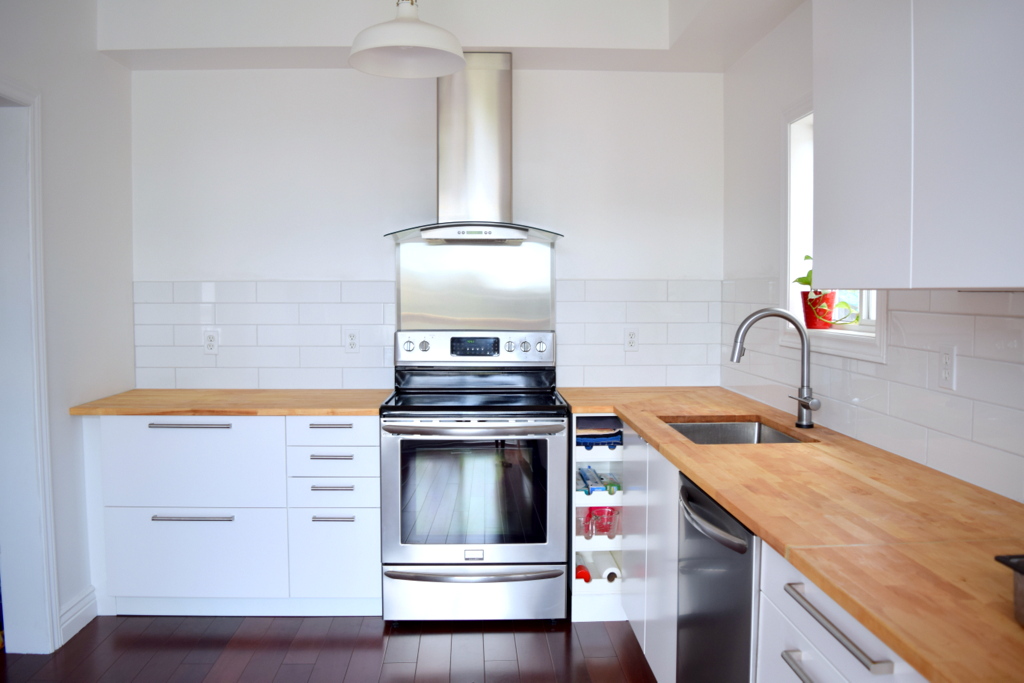
And this is THE IKEA SEKTION KITCHEN AFTER
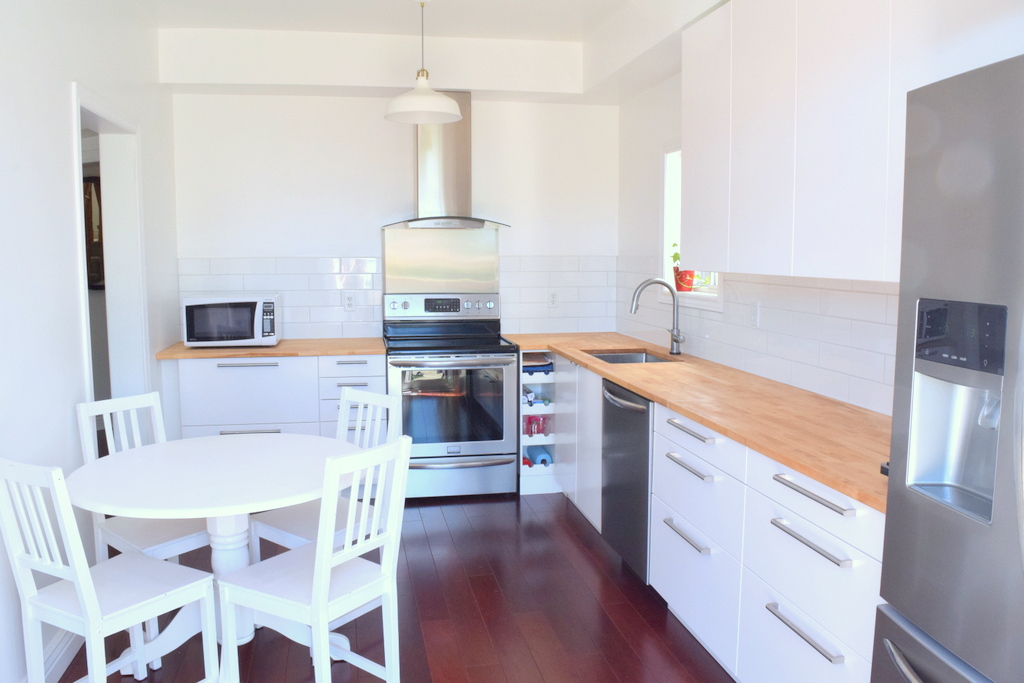
I still love seeing this BEFORE AND AFTER.
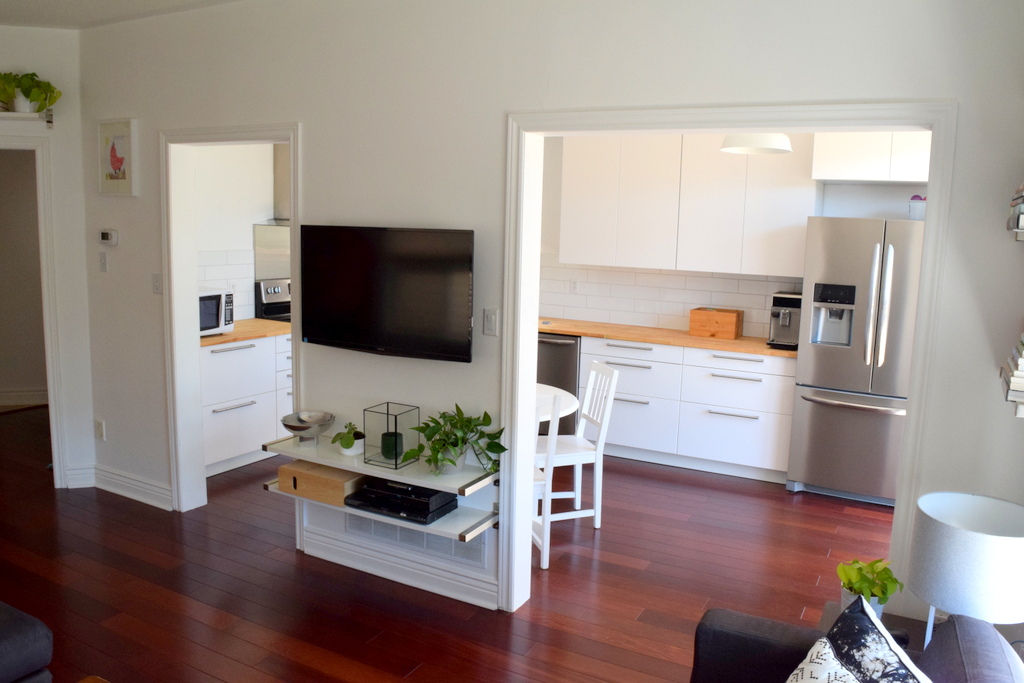
Bright and modern. Oh so clean and semi-open concept.
That wall with the TV on it is a load bearing one and as much as we love HGTV’s ability to knock them all down, we could not. Why? Simply put, budget. I hope this helps give you an idea of a work around, that still gives the room a good flow.
Truth be told, we do like a little bit of an antique aesthetic, but it just didn’t suit the feel of this particular house. You’ll also notice that it is very minimal in its design. That is intentional. After living with years of clutter everywhere above, we wanted a spot for everything to be stored out of sight.
IKEA SEKTION KITCHEN – PRODUCTS USED
The doors and drawer cabinet fronts we used were the IKEA VEDDINGE line.
We went back and forth between shaker style and flat front cabinet doors and the reason we went with flat front is two fold.
1) They’re easier to clean. At least for me. I’ve lived with shaker doors for well over half my life. While I love the look of them, it is inevitable that I will not get on top of cleaning all the dust that falls into the grooves of the shaker doors in time. Sorry I have to be truthful here. With these, you spray and wipe and you are done.
2) The IKEA SEKTION kitchen line does offer a Shaker door style – the GRIMSLÖV – but for some reason they introduced them in an Off White/Cream colour vs a Bright White. In real life it was really disappointing to see them after the beautiful ADEL doors.
Why IKEA changed the shades slightly is beyond me but they’re not the same thing. Go in person and compare. So we went with the VEDDINGE doors instead.
UPDATE: Since the post was written, IKEA has released their AXSTAD SEKTION kitchen doors and drawer fronts and this is the crisp white, quasi shaker panel everyone has been waiting for. Rejoice!
OTHER PRODUCTS WE USED IN THE IKEA SEKTION KITCHEN RENOVATION
APPLIANCES
All of the appliances are from Frigidaire and they are from their Gallery line.
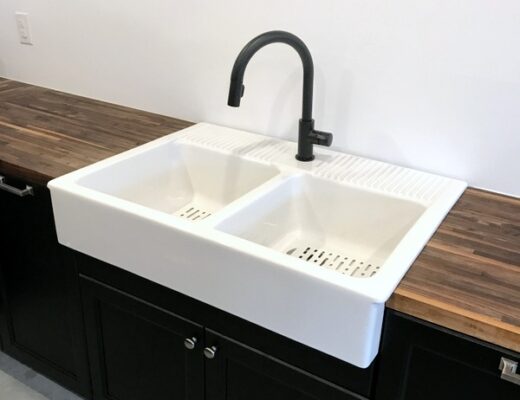
FAUCET
The faucet is from DELTA Faucet. It is the Trinsic Single Handle pull down featuring Touch2O technology. Everyone who tries it think it’s the coolest thing since sliced bread, as you can touch any part of the faucet to turn the water on and off.
Delta makes really great high quality faucets as well as other kitchen and bath items and they come in many different colors from stainless steel, to champagne bronze and matte black (which we used in our current kitchen).
KITCHEN SINK
We used the IKEA BREDSKÄR Single Bowl Sink (which has since been discontinued) but IKEA has tons of new ones in its place. You can however read about how we installed the under mount sink into butcher block in our post about Installing your IKEA SEKTION kitchen.
BACKSPLASH
4″ x 16″ white subway tile (made way more sense than the smaller size tiles) complimented the flow of the drawer cabinets and L shape of the kitchen.
BACKSPLASH BEHIND THE RANGE
The stainless steel backsplash behind the oven is from INOXIA and we picked that up at Home Depot but Amazon has some similar ones and so does Costco.
LESSONS AND TIPS WE LEARNED
WHILE INSTALLING OUR IKEA SEKTION KITCHEN
1 – Order all of your cabinets and pieces before you tear apart or demo your kitchen.
Repeat that to sentence to yourself again. We waited over 5 months for a huge chunk of the drawer fronts, all of which IKEA reps assured me would be in stock within 2 weeks. What they didn’t count on was the demand for the SEKTION kitchen at the time that it launched and the manufacturer of the items couldn’t keep up with demand.
Then when they arrived, they arrived in tiny shipments to various IKEA’s all around the country. There were a lot of angry people online. So before you so much as remove as hinge or a screw in your existing kitchen, make sure you have all the parts at your home.
2 – For those of you using Butcher Block (be it IKEA or otherwise).
If you’re using IKEA butcher block, open the package while you’re at the IKEA store, unless you’re getting it shipped. The butcher block can fit into the back of your average pick up truck horizontally. This includes the 98″ long piece so take note of the other countertop measurements. The reason we suggest to opening the end of the box, is it will tell you fairly quickly if it is warped.
Wood as we all know, can warp. We discovered one of our pieces did after it arrived and had to go exchange it. It was also temporarily sold out. This way you it will save you the headache of returning it.
3 – Definitely get drawer cabinets if space allows.
Get the kitchen cabinet drawers on the bottom. Having now lived with this kitchen with drawer cabinets at the bottom, I’d be hard pressed to go back to regular vertical bottom cabinets. Drawers hold everything. EVERYTHING. You truly do get more space having those deep drawers.
You can also get the drawers within the traditional vertical cabinet doors on the front if you prefer that look, but you will however lose an inch or so of drawer space. And believe me, big cereal boxes mean that extra side inch of storage space helps.
4 – If you don’t want handles, get the push door hinges.
IKEA sells push open door hinges called the BESTA. So if you’re wondering why we don’t have handles on the top cabinets, it’s because they’re push hinges. All you have to do is gently tap the door to open it and it pops open.
5 – The IKEA kitchen planner and in store staff kitchen assistance.
By all means use the IKEA kitchen planner to plan out your kitchen layout. You can spend days on there trying out hundreds of combos.
Sit down with a kitchen representative at least once. You can plan your kitchen on your IKEA Kitchen planner at home all you want, but they will definitely help with the finer details. Highly recommend this.
6 – Wait for the Kitchen Event.
If you can wait until IKEA has their Kitchen Event, then seriously wait. We saved back a big chunk of money for every $1000 we spent.
7 – The new suspension rail system is amazing!
The IKEA SEKTION kitchen hanging rail system does make things easier than the old one – read how we installed it here. You absolutely need two people to do this, unless you are a wizard. If you are that wizard, I bow to you.
8 – If budget allows, buy extra cabinet fronts.
Pick up extra kitchen cabinet fronts if you are buying a less popular drawer or door front. IKEA often changes their kitchen cabinet doors and drawers. Should something bad happen to one of them, you may find yourself going into the store thinking I’ll just buy a replacement. That’s when you’ll discover they’re being discontinued.
Certain lines like BODBYN and GRIMSLOV are tried and true favorites. The one we got for our current kitchen, the LAXARBY, was discontinued before we could finish the upper kitchen cabinets. I can’t make this up. So we’re now doing a two tone kitchen.
WE FINISHED THE KITCHEN REMODEL…THEN WE MOVED
A funny thing happened at the same time that we finished this kitchen renovation. We had not planned on moving but a house in the pocket of our neighbourhood that we always wanted to live in went up for sale.
That led to putting this house up for sale and less than a week on the market later, we had a Sold sign on our front lawn. So yeah. I got to enjoy this kitchen for a grand total of two months.
And if you think our old kitchen in the BEFORE photos was an ode to 80’s country dream, wait until you see the one we are currently renovating.
1 – Planning your IKEA Kitchen Remodel
2 – Installing your IKEA SEKTION kitchen cabinets
3 – Adventures in Staining Butcher Block
4 – IKEA Kitchen Before and After Reveal
1 Comment
Nadia
February 25, 2025 at 7:44 pmThis is super helpful. Thank you for posting! I bought my home and the previous owner’s had installed the same IKEA cabinet system you did. I couldn’t figure out what it was going on IKEA’s website. I needed to add some additional kitchen cabinetry and have felt stymied for awhile until I found your post!