
Christmas crafts in our house are underway. I’ve toned them down this year because well, there’s a lot of nice holiday products in stores. Yes I just said that. My hypocrisy is very obvious as I am about to show you how I made (and how you can make) a festive felt Christmas wreath. This is one of the exceptions to this season because I love felt. It’s easily up there with my absolute favorite material to craft with it because it forgives a multitude of scissor mistakes and withstands awful weather outside.
Let us begin, before I go to HomeSense and buy Christmas ornaments to avoid making pom pom ornaments again (PS – the kids have already made new ones this year.)
Supplies you need to make your Felt Christmas Wreath
ITEM LIST:
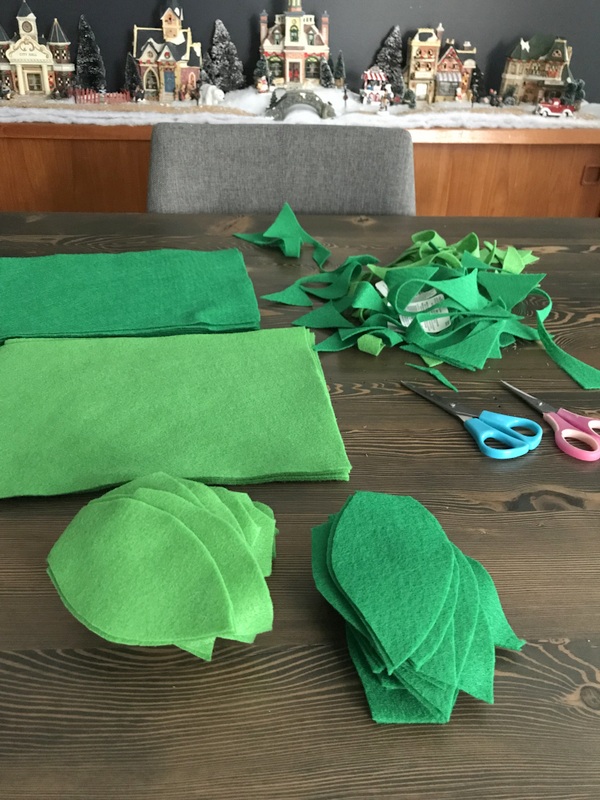
- 2 different shades of green felt, one lighter and one darker (approximately 10 sheets each) – I got mine at Michael’s.
- Scissors (really good sharp scissors)
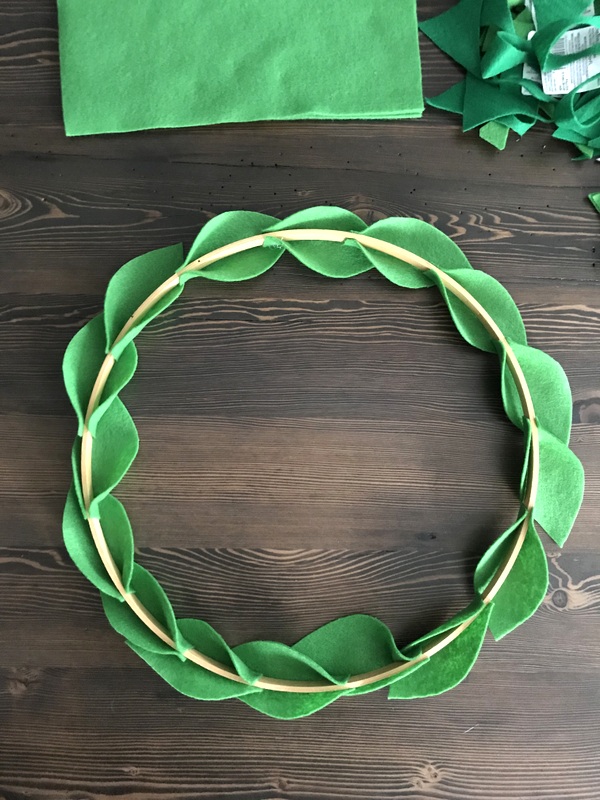
- 14″ embroidery hoop (use the inner part for your wreath)
- Glue gun and glue sticks
- Red pom poms
Step 1
Cut out a lot of leaves. I fold my felt sheets in half and that gives me about 8 leaves in total per felt sheet. If you want smaller leaves, you can get 10.
Step 2
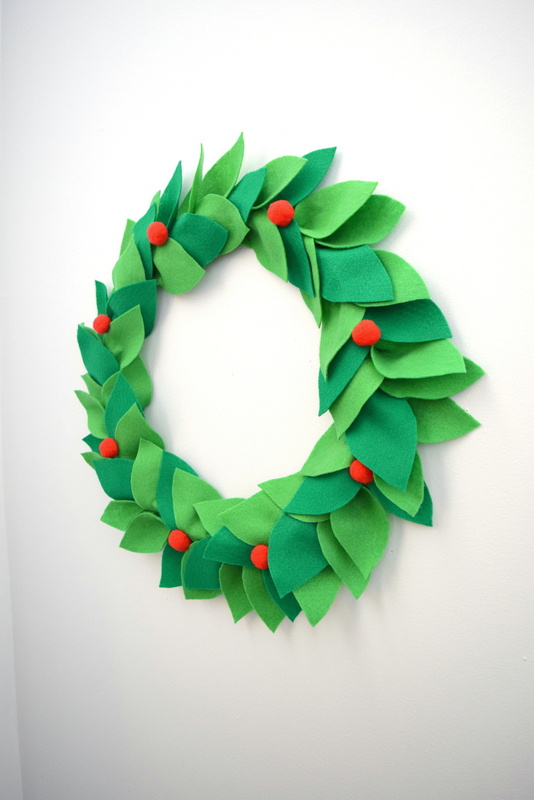
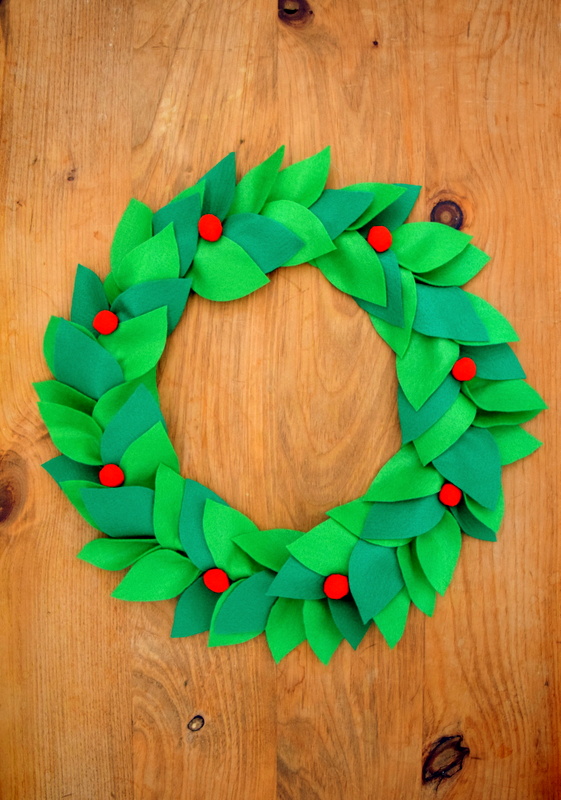
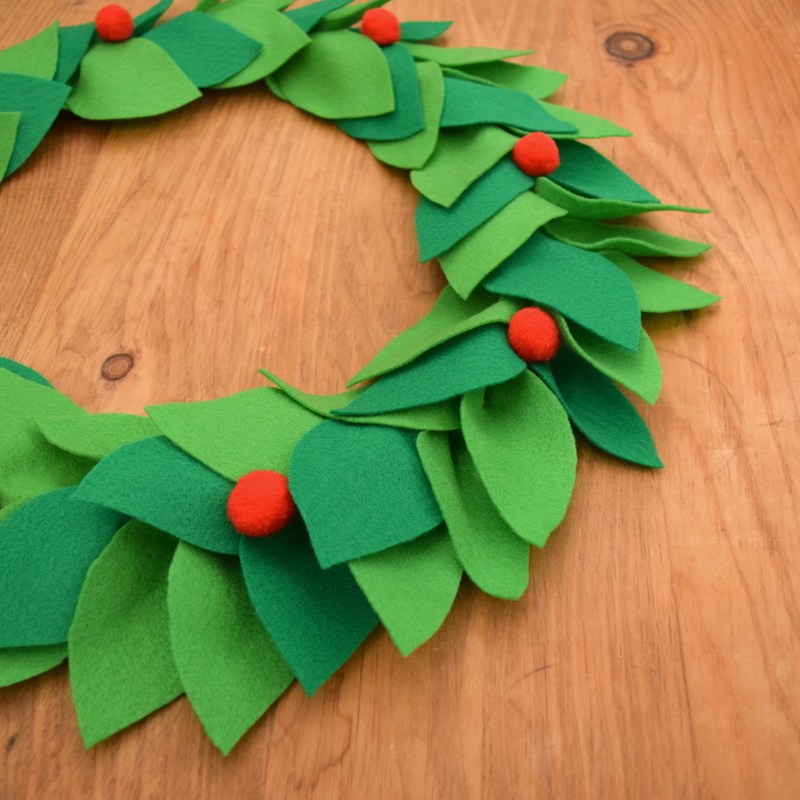
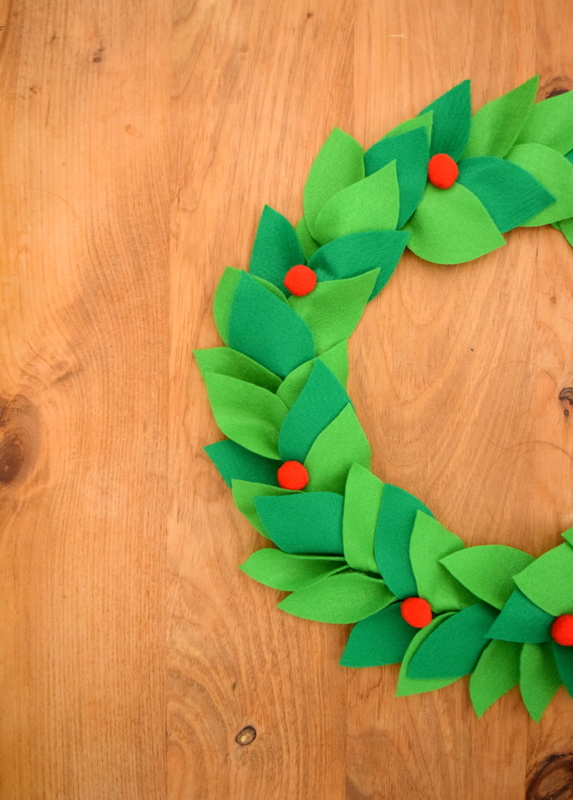
Glue the lighter green leaves all around your embroidery hoop, as shown in the photos below.

Step 3
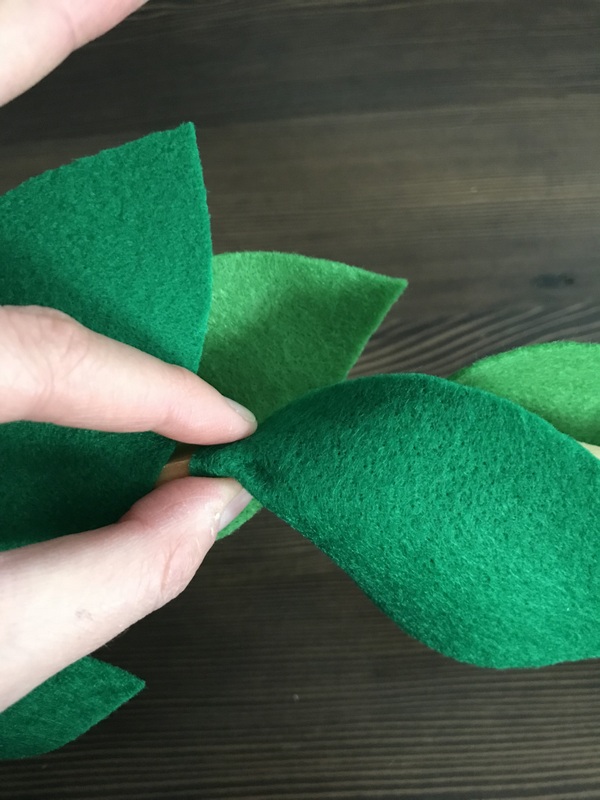
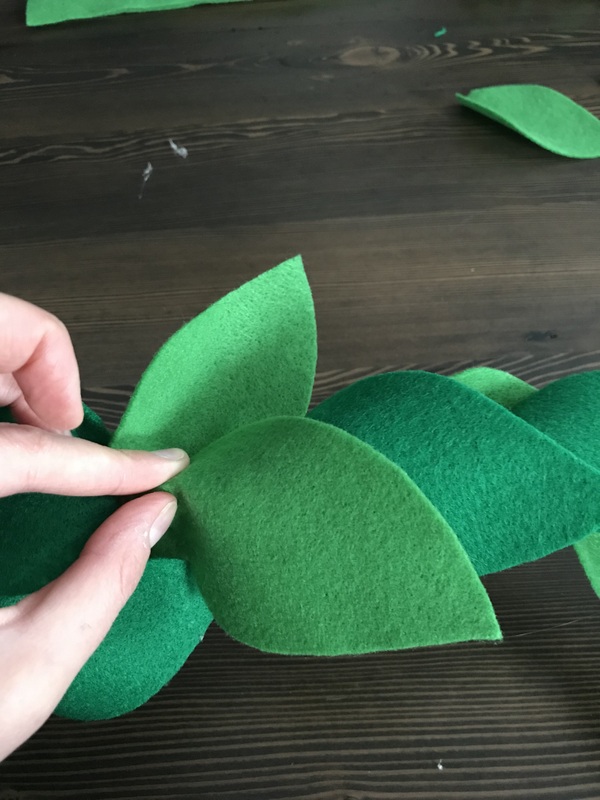
Glue your darker leaves on the gaps between the the first set of lighter leaves.
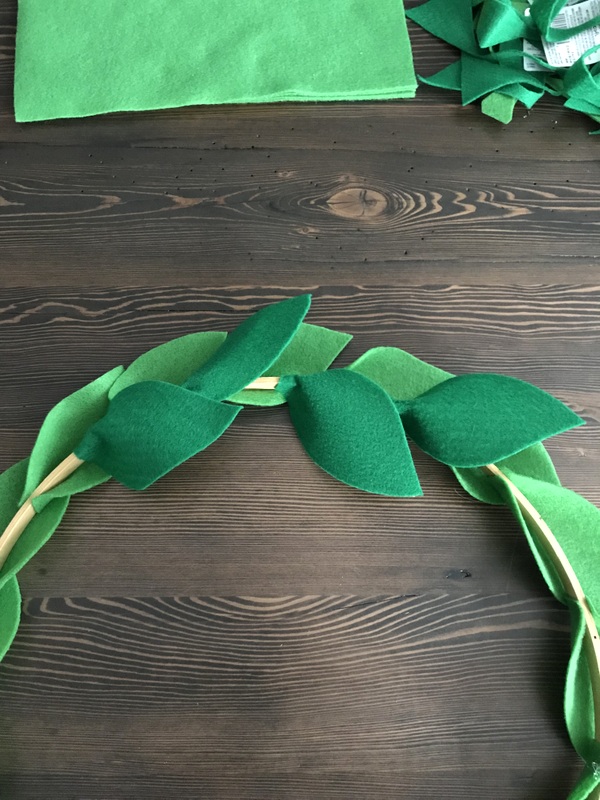
You can pinch them as you glue them to make them go in the direction you want. I did one up, one down, one up, etc.
Step 4
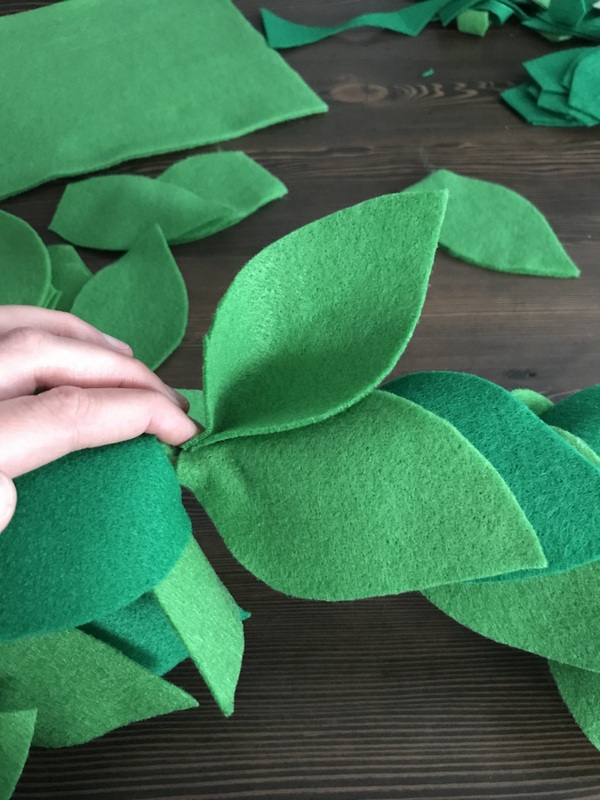
Repeat this process with the lighter colour leaves.
Step 5
Fill in the remaining gaps with the leave colours of your choice as show below. This position of the leaf will give your wreath fullness.
Step 6
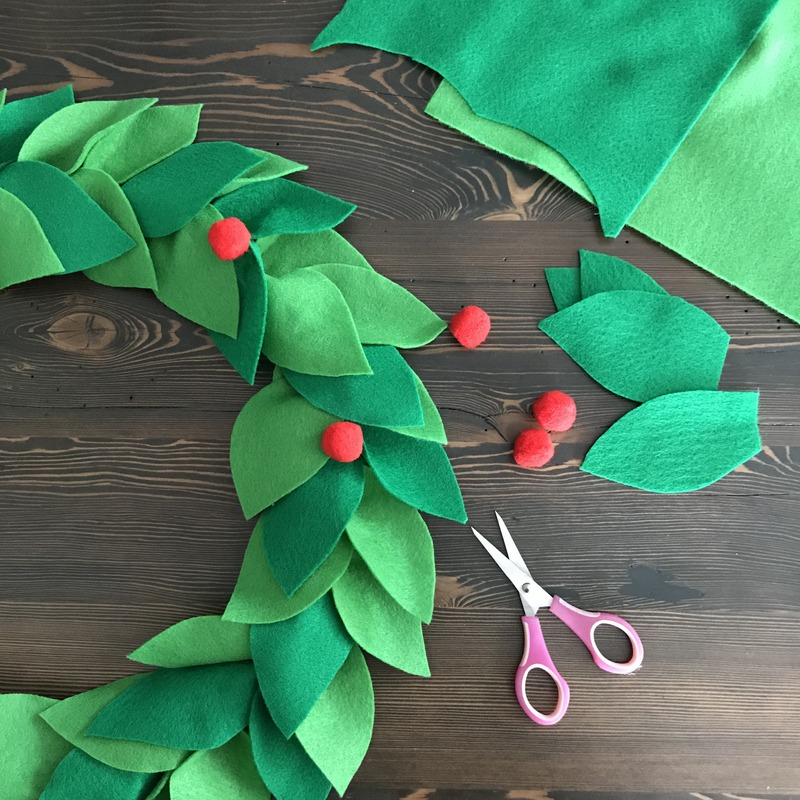
Glue on pom poms.
Step 7
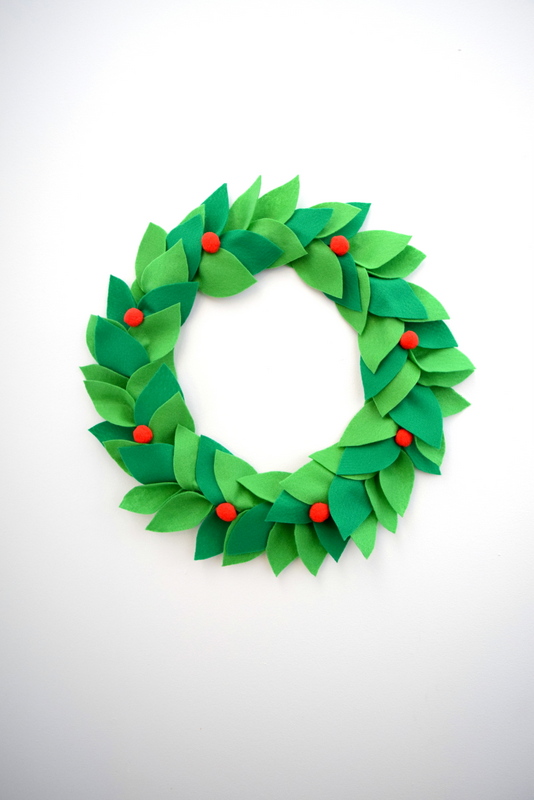
Take as many photos of your wreath as humanely possible to share on your blog.


For those of you who are like, “Hey, I should make one for Fall!” – here it is:

Don’t worry. Winter is coming. All Game of Thrones jokes aside.


No Comments