
Several months ago I made a wood veneer pendant lampshade and I was really happy with how it turned out. So why haven’t I shown it here yet? Because it’s been sitting in our future home office instead of being hung up in all its glory, because apparently I am indecisive and changed my mind about ten times on where I wanted to hang it. BUT it was the inspiration for these wood veneer ornaments!
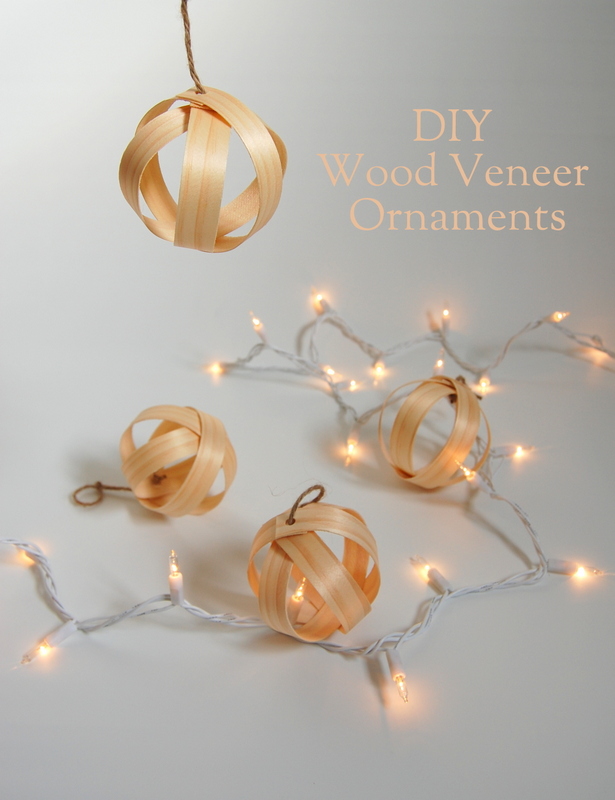
How to make wood veneer ornaments
I have a giant (and I mean giant) spool of wood veneer leftover from that project that I need to use up. I used some of it to make these wood pallet Father’s Day cards.
It was perfect for these ornaments for Christmas.
What you’ll need to do this:
- Pine Wood Veneer Edging (you can buy this at any major home improvement store – I got this particular spool at Home Depot from a brand called Bennett)
- E6000 Adhesive Glue
- twine or hanging thread of your choice
- scissors
- hole punch
- ruler
- clamps or binder clips
Step 1
Cut out six, 10.5″ (26.5 cm) strips of wood veneer and punch a hole on both ends of each strip.

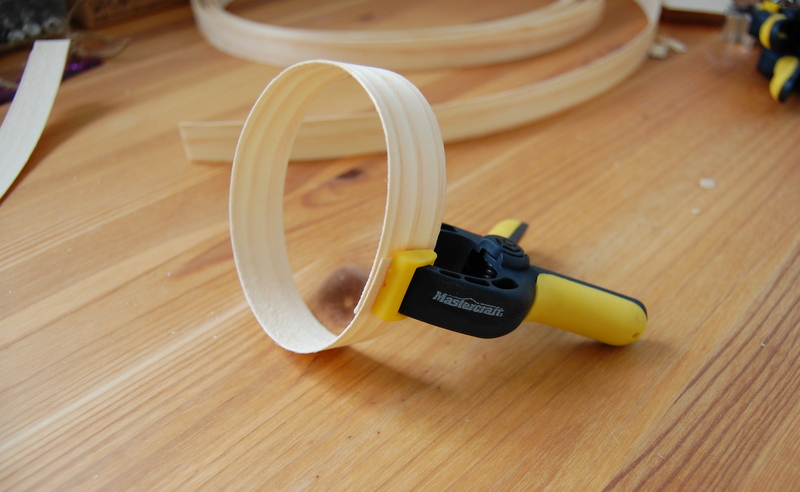
Step 2
Form a circle with the ends of your strips and use the permanent glue to glue them together. Then use your clamps or binder clips to hold them in place while they dry.
You can try and do this with all 3 strips at once. But you risk the glue seeping through the holes and the edges, thus sticking your strip layers together. Then you won’t be able move your strips into the exact position to create a sphere after they are dry.
DO NOT USE A GLUE GUN FOR THIS.
The first time I tried doing this I used my glue gun. I never learn. Bad idea. The glue did not hold at all and by the next day the strips had popped apart.
You need a strong, permanent adhesive for this and E6000 is by far my favorite permanent glue.
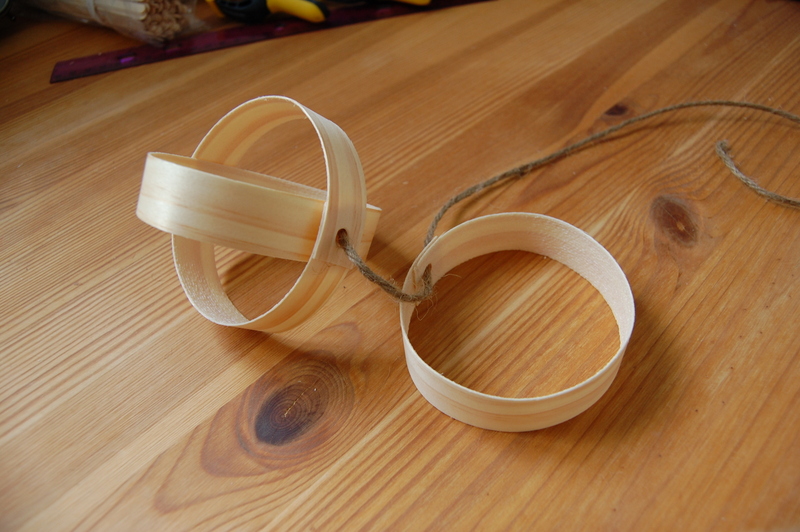
Step 3
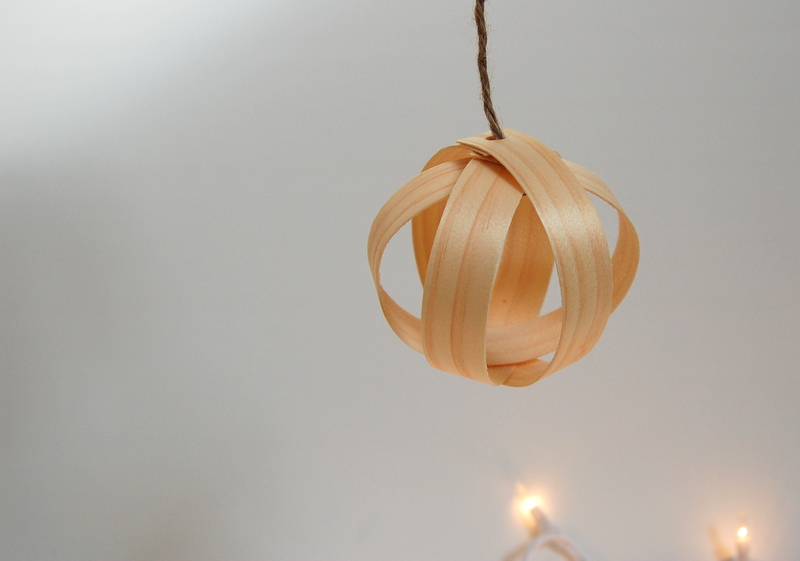
Tie a knot and thread your ornaments with your choice of thread. I used twine because I wanted a bit of a rustic look.
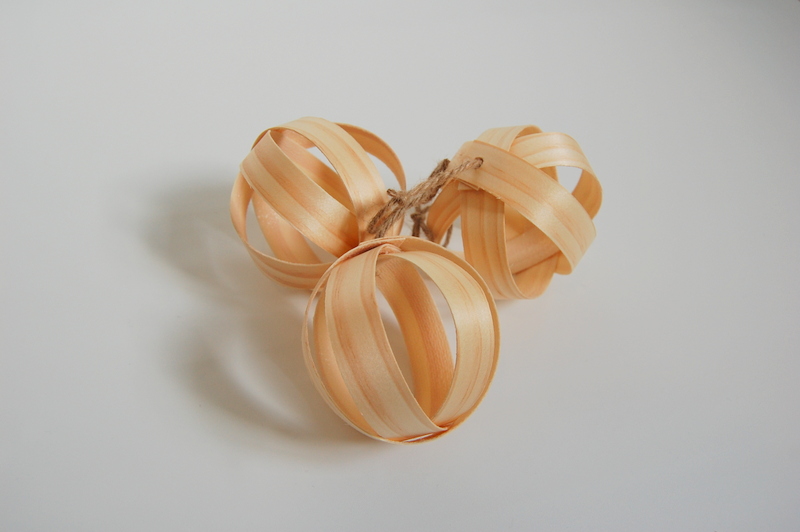
Step 4
Marvel at your inexpensive yet expensive looking wood veneer orb ornament.
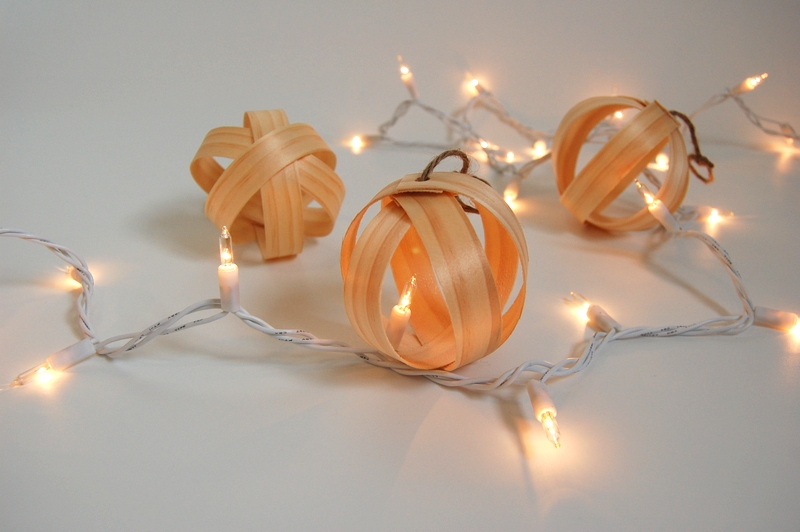
I used Pine Veneer because Pine gives a really nice warm glow against your classic Christmas lights.
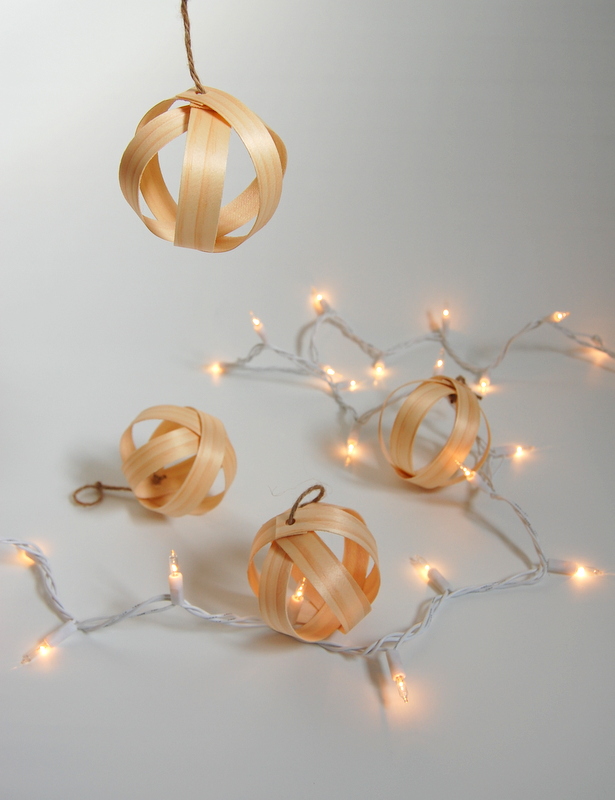
Now go decorate your tree.
It is up already isn’t it?
Just me?
Damnit. I mean Darnit…Santa.

29 Comments
Kate
November 19, 2013 at 3:41 pmAlex, these are just beautiful! I love natural, organic ornaments and these are perfect… I hear the DIY store calling. Shouting in fact. LOUDLY. Thank you, for yet another inspired idea!
Alex
November 22, 2013 at 11:50 amThanks Kate!! I can’t wait to see the rest of your Holiday items and the Pirate Party!
Stacey
November 19, 2013 at 3:55 pmGORGEOUS! I love finding ways to use veneer. My only problem is I can’t find it locally without the glue already on it. UGH! Lovely ornaments, Alex. You never cease to amaze me with your great ideas and beautiful pictures.
Alex
November 22, 2013 at 11:51 amThese ones have the glue on the back but they’re not as noticeable. I wish I could find the glueless ones too as I wanted to stain this particular one but I can’t do the backing b/c of it.
Danielle from Storypiece
November 19, 2013 at 8:30 pmThese are such fun ornaments, but now I want a set for a decorative bowl in our family room. These are so beautiful, they’d be great all year round!
Alex
November 22, 2013 at 11:51 amDo a bowl! Just don’t do hole punches. 🙂
Carolyn
November 19, 2013 at 9:43 pmElegant and beautiful!
Alex
November 22, 2013 at 11:51 amThank you so much!
Heather
November 19, 2013 at 10:13 pmCome on! Those are amazing Alex. Hitting the depot this weekend to get supplies.
Alex
November 22, 2013 at 11:52 amGo get your craft on!! 🙂
now at home mom
November 19, 2013 at 10:46 pmoh! I love these very much Alex! they are so you, they are beautiful! (not kidding) 🙂 these would look great in a big white bowl too, place in the middle of a big coffee table & you wouldn’t need to remove them after the Holidays! 🙂
you know, our tree has been up since last weekend but Nate keeps pulling it (every day) and he broke some ornaments (don’t know what to do with this little one) 😉
Alex
November 22, 2013 at 11:53 amThe bowl thing has become a theme in the comments. I say everyone makes some without a hole punch. 🙂
Oh don’t worry Little C keeps picking and rearranging our decorations. Half the time I find them in clusters on one branch.
Victoria • Restoring our Victorian
November 20, 2013 at 9:22 amLove it! This would be cute all year round. Danielle pretty much stole my idea… You could just hide the strings in the middle of the pile.
My entire downstairs is an explosion of Christmas crap. The ONLY thing I don’t have is a tree.
Alex
November 22, 2013 at 11:54 amSkip the whole punch and just glue them together. Perhaps add some glitter…hmmm…I think they’d look awesome darker and mixed with disco balls. 😉
Tash @ The Dreamhouse Project
November 20, 2013 at 12:47 pmOMG! Alex I LOVE these! Soo cute. I was thinking how awesome they’d look after Christmas in a decorative bowl for a coffee table…and then I read the comments above, lol! I guess great minds think alike! 🙂
Alex
November 22, 2013 at 11:55 amI am going to have make a bowl of these and give them out as Christmas presents.
Natalie
November 20, 2013 at 5:04 pmMust get wood veneer!!! Who knew?? And can you get E6000 at Home Depot? These would be great for daycare provider gifts or to decorate gifts too!
Alex
November 22, 2013 at 11:56 amYou can totally get E6000 at Home Depot or Walmart or Target or Michael’s etc. It’s usually in the hardware sections vs the craft area. Not that some of them have craft areas. You know what I mean. 🙂
kim @ DESIGN + LIFE + KIDS
November 20, 2013 at 9:05 pmseriously brilliant!
Alex
November 22, 2013 at 11:57 amThank you! 🙂
Jan
November 20, 2013 at 10:27 pmCute Alex!
Alex
November 22, 2013 at 11:57 amThank you so much and thank you for featuring them in your Babble Round Up. That’s an early Christmas present for me. 🙂
thelearnerobserver
November 21, 2013 at 8:02 amLove it. Pinned it. I want wood veneer.
Alex
November 22, 2013 at 11:58 amI have lots here. Lots. Shall I drive some over? lol. I also have ribbons, felt and masses of baking soda dough ornaments.
Jo-Anna
November 22, 2013 at 11:23 pmThese ornaments are so great! They would look so perfect attached to a string of lights too! Gorgeousness!
Lauren @ The Thinking Closet
November 23, 2013 at 8:28 pmThere is drool all over my laptop now thanks to this post. Your style and my style must be best friends. 🙂
Cate Moore
December 16, 2013 at 8:18 pmYou’re so talented, Alex. These are beautiful!
Peg Nelson
June 24, 2014 at 7:00 amI wonder what would happen if you were to iron the veneer tape onto decorative paper…or metallic paper, and then trim off the excess before making the circles. That would solve the glue problem and add a finished appearance.
Old Woodworker
July 26, 2016 at 2:57 pmAs a woodworker, I always have plenty of scraps left over. This is a great little project to use some of that extra veneer. They really are very nice. Sometimes the veneer bands come with heat activated glue already, so they might be stuck together using an iron.